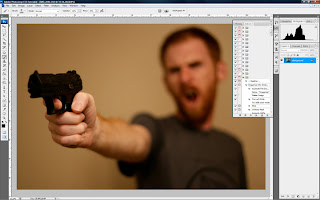
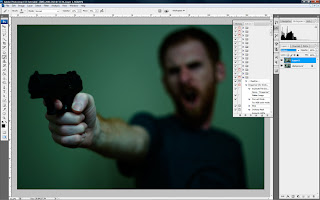
First of all, I always think about how I want to light my subject before doing anything. I knew I wanted the light to bring attention to my point of focus and then feather off on the rest of my body, so I used the modeling light from my Alien Bee's B800 through a large softbox above my hand. But you just have just used something like a shop light with baking paper over it for diffusion.
Either way, I wanted a shallow depth of field, so I shot with my aperture set at f1.8 so that just my hand/gun were in focus.
After opening up my photo in camera raw, I adjusted the hue and tint until I got a pale sickly green color. You might have also gone with a bluish tint or whatever suits your taste.
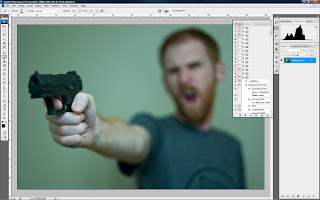
Next I made a copy of the backgroung layer (ctrl+j) and then set the blending mode to multiply.
 I then slightly desaturated that layer with the hue/adjustment command and then made another copy of the background layer and desaturated that just a smidge as well. After that, I added a mask to the top layer and used a soft black brush (opacity=15-20% flow=70-80%) to bring back the highlights that were too dark and to bring back detail in the gun. this is sort of akin to dodging and burning.
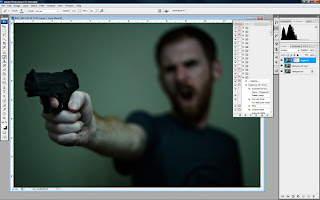
After I've gotten that the way I want, I flatten my image. In this shot, i wanted as much resolution as possible, so I shot it close up. But now I want more room to the left. So I double click on my layer and when the dialogue box pops up I say okay. This makes it a in editable layer. Then I crop it past in the aspect ratio that I want.
The problem you see is that it gave me some empty pixels on the left. So what you do is sample the colors from the edge, make a new layer underneath and then fill it with that color. You can then smooth out the transition by making a mask on the top layer and then with a soft black brush feather it in.

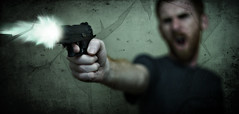
I then downloaded a free muzzle flash from http://www.detonationfilms.com/free_stuff.htm and placed it over my gun barrell.
I didn't like the way the color matched up, so I used a hue/saturation adjustment to get a color I wanted. It's a wee bit to saturated, but it gave me the right brightness, so i'll fix this later.
Now, my way is just a little too clean for this sort of thing, so I grabbed a texture from one of my favorite sources on flickr (do a search there are lots of people offering free textures). and I desaturated it and sized it over my photo.
I then set the scrolled through the blending modes until I found one that I liked. I went with multiply.

Next I added a mask to the texture and with a soft black brush with a low opacity, I slowly brushed out anything that was distracting from my image. I then found another texture I liked and did the same.
After all of that was done I flattened my image and then made a copy of the background layer. I then began to draw a "shattered shard" with the polygonal lasso tool and then hit ctrl+J. This made a copy of just that part of the background image.
Then I rotated the image just slightly to reposition the "shard".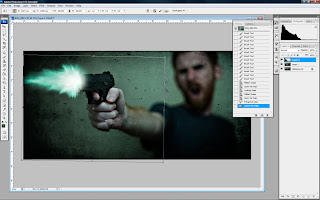
I did this until I had many shards breaking up the photo. Then I went back to the bottom layer and adjusted the levels a bit so that it had a different look than the rest of the shards. Now everything's starting to take shape.
Then I added a slight drop shadow to all of the upper shards.
After I was satisfied with the results I then finished it off by flattening it, adding a little diffusion and then sharpening it slightly. Hope that helps. See you next time.


